Building an Alexa skill might seem daunting, but it’s surprisingly straightforward. This guide provides a comprehensive walkthrough of creating a simple fact-based skill, perfect for beginners. We’ll cover everything from setting up your developer account to submitting your skill for certification. Follow along, and you’ll be well on your way to developing your own voice-activated application for Amazon’s Alexa.
 Alexa Developer Console Skill Creation Checklist
Setting Up Your Alexa Skill in the Developer Portal
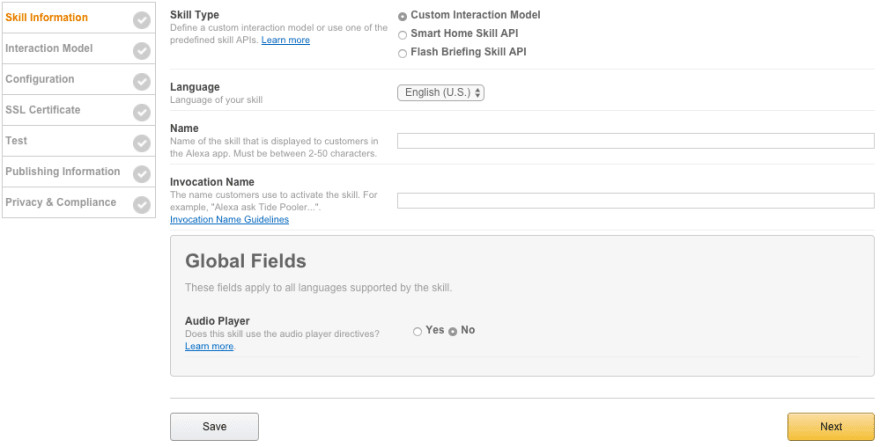
The first step is to create an Amazon Developer account (it’s free!). The developer console is user-friendly, and creating a new skill is a simple process. You’ll be guided through a checklist, where you’ll define key aspects of your skill, including its invocation name (the name users will say to activate it). Choose a clear and memorable invocation name that directly relates to your skill’s functionality.
Defining the Interaction Model
Next, you’ll define the interaction model using the Skill Builder, a tool that helps you map user requests (utterances) to specific actions (intents). This is similar to other natural language processing platforms like Microsoft LUIS. You’ll create intents and provide examples of what users might say to trigger them. For a fact skill, you’ll likely have a single intent like “GetFactIntent” with utterances such as “tell me a fact” or “give me a random fact.”
 Example Utterances in Alexa Skill Builder
Once you’ve defined your interaction model, save and build it. The build process typically takes a short time.
Setting Up a Lambda Function Using Amazon Web Services
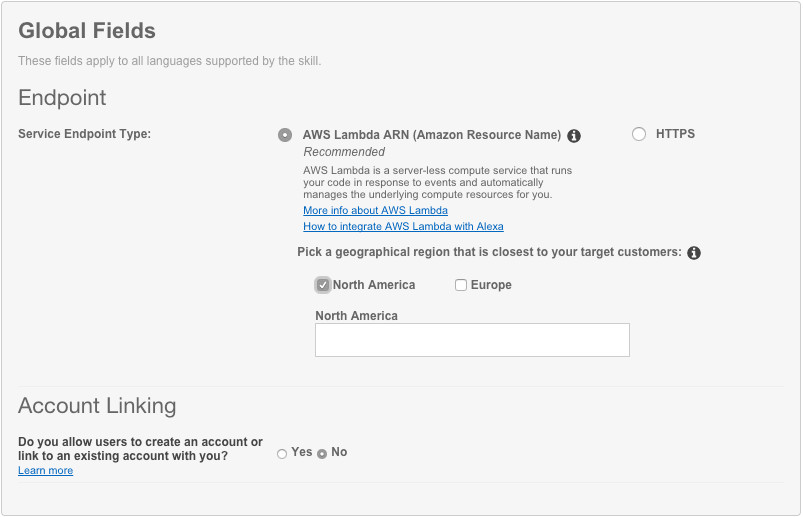
Your Alexa skill needs a backend to process requests and provide responses. This is where AWS Lambda comes in. Lambda allows you to run code without provisioning servers. Choose a blueprint for the Alexa Skills Kit, set the Alexa Skills Kit as a trigger, and configure a Lambda role. Remember that Lambda’s availability might be limited to specific regions.
Connecting Your Voice User Interface to Your Lambda Function
After setting up your Lambda function, you need to connect it to your skill’s voice user interface. This involves linking the AWS Lambda function ARN (Amazon Resource Name) to your skill in the developer console. This establishes the communication pathway between Alexa and your backend logic.
 Linking Alexa Skill to Lambda Function
Testing Your Alexa Skill
Thorough testing is crucial to ensure your skill functions correctly. Amazon provides tools for testing within the developer console, including a voice simulator and a service simulator. You can also utilize tools like Echosim.io for realistic testing or implement unit testing for more comprehensive coverage.
Customizing Your Skill
Now for the fun part: customizing the skill with your own content. For a fact skill, this involves populating your Lambda function code with an array of facts. Aim for a substantial number of facts to provide a varied and engaging user experience. You’ll also need to adjust other aspects of the code, such as the skill name and help messages, to align with your specific skill. Refer to Amazon’s GitHub repositories for code samples and templates.
Getting Your Skill Certified and Published
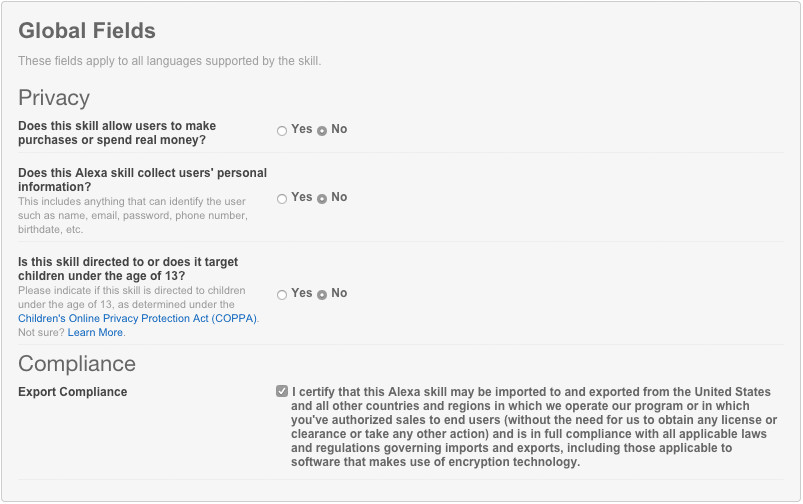
The final step is to prepare your skill for publication in the Alexa Skills Store. This involves providing necessary information, such as a skill description, example phrases, icons, and privacy details. Ensure you follow Amazon’s guidelines for skill submission and certification.
 Skill Certification Privacy Questions in Alexa Developer Console
Once submitted, Amazon will review your skill, and you’ll receive feedback within a specified timeframe.
Building an Alexa skill is an accessible and rewarding experience. By following these steps, you can transform your ideas into voice-activated realities, contributing to the ever-growing ecosystem of Alexa skills.