Deleting your Alexa history is crucial for maintaining your privacy and controlling the data Amazon collects. This guide provides step-by-step instructions on how to erase your Alexa history, ensuring your conversations with your smart speaker remain private.
Why Delete Your Alexa Voice History?
Alexa learns from your interactions, storing data about your usage patterns to improve its responses. This data, saved on online servers under your account, includes details of your queries. While this helps Alexa understand you better, it also raises privacy concerns. Deleting your history minimizes the risk of unwanted ads or potential privacy breaches stemming from recorded conversations.
Updating Your Alexa App
Before deleting your history, ensure your Alexa app is up-to-date to access the latest features and optimal performance.
To update on iOS:
- Go to the App Store and select your Account profile.
- Scroll down to Available Updates.
- Update the Alexa app if available, or choose Update All.
To update on Android:
- Open the Google Play Store and select your Profile.
- Select Manage apps and device then Manage.
- Click Updates available.
- If an update is available for the Alexa app, click Update.
 Updating the Alexa app on your smartphone.
Deleting Your Alexa History: Step-by-Step
Follow these steps to delete your Alexa history:
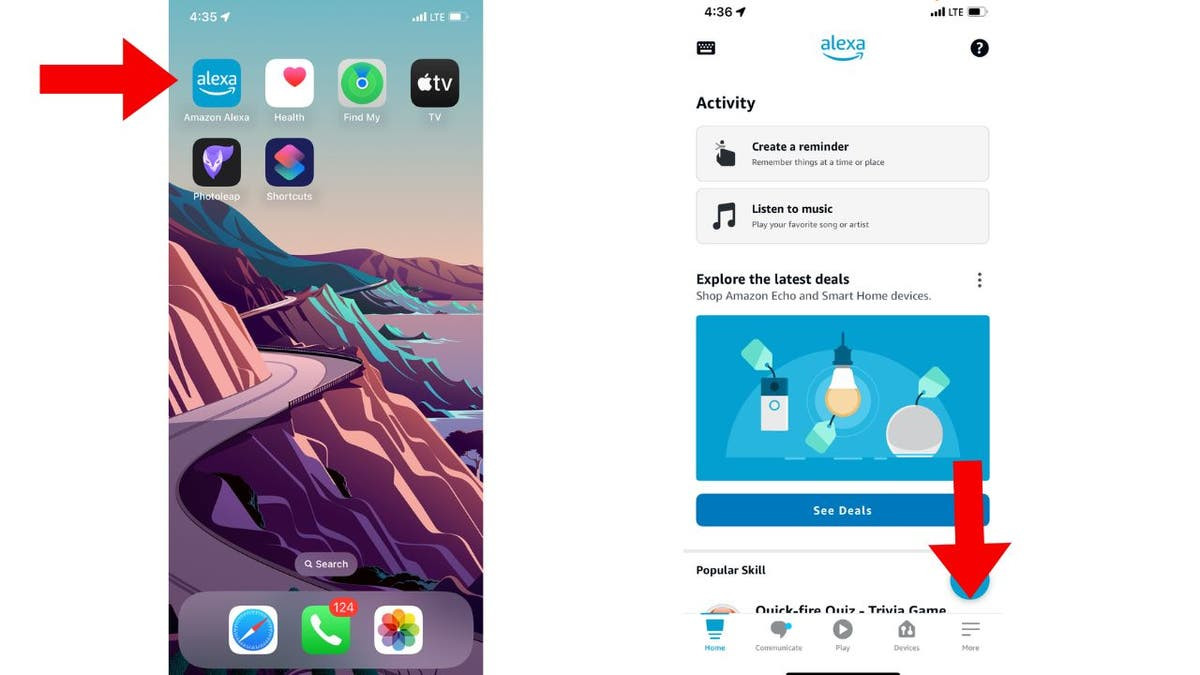
- Open the Alexa App: Launch the Alexa app on your smartphone and tap the More button in the lower right corner. Then, navigate to Settings and select Alexa Privacy.
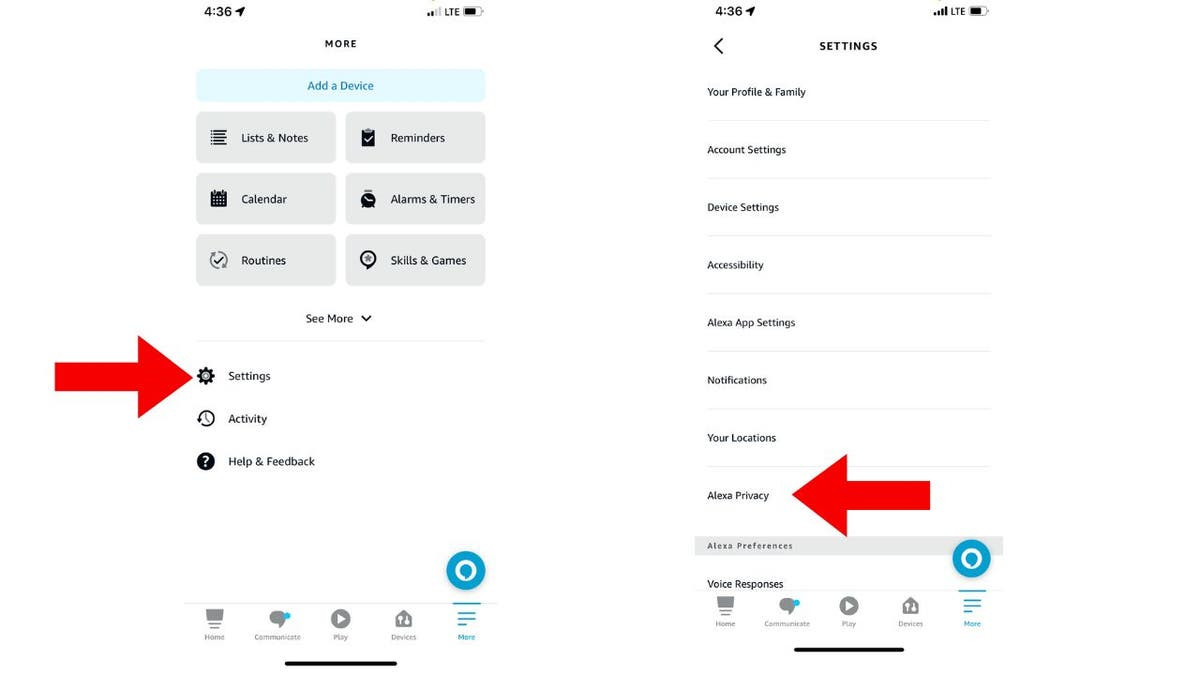 Accessing Alexa Privacy settings in the app.
- Review Voice History: Tap on Review Voice History. This section allows you to review and delete stored voice data.
 Reviewing your voice history within the Alexa Privacy settings.
- Filter Your History: Use the dropdown menus to filter your history by date (Today, Yesterday, Last 7 days, Last 30 days, All History) and device or profile.
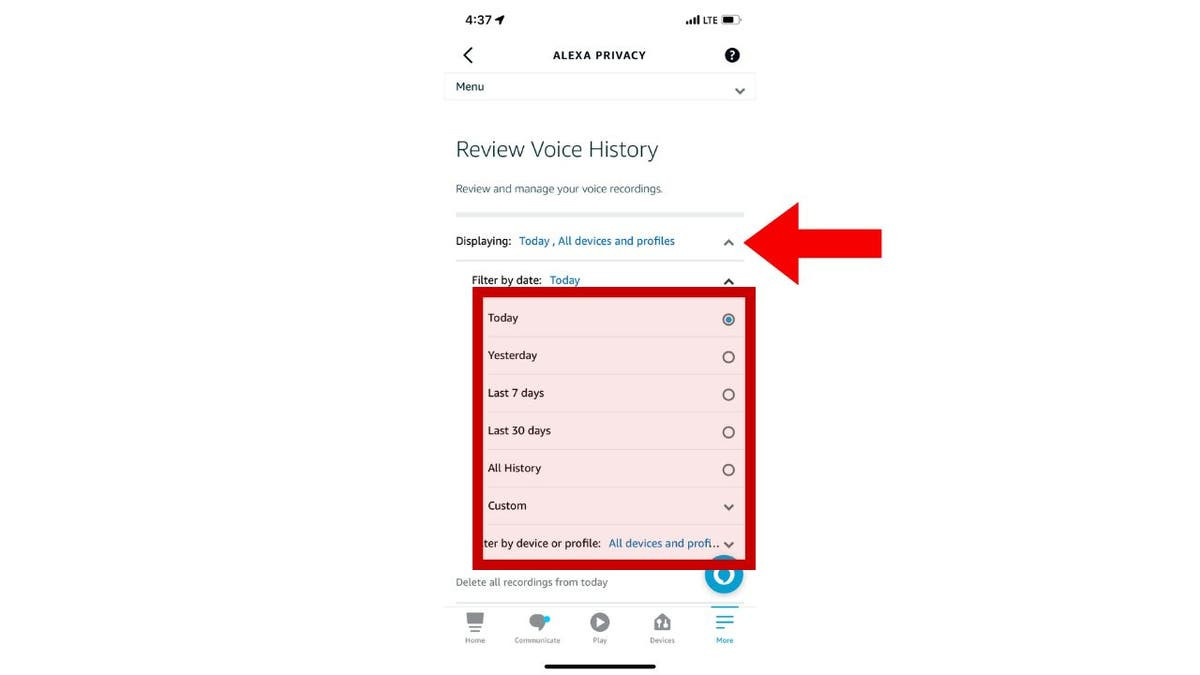 Filtering your Alexa voice history by date and device.
- Delete Recordings: Select the desired date range and tap Delete to remove those recordings. Confirm your decision by clicking Delete again. To delete all recordings, select All History and tap Delete all of my recordings.
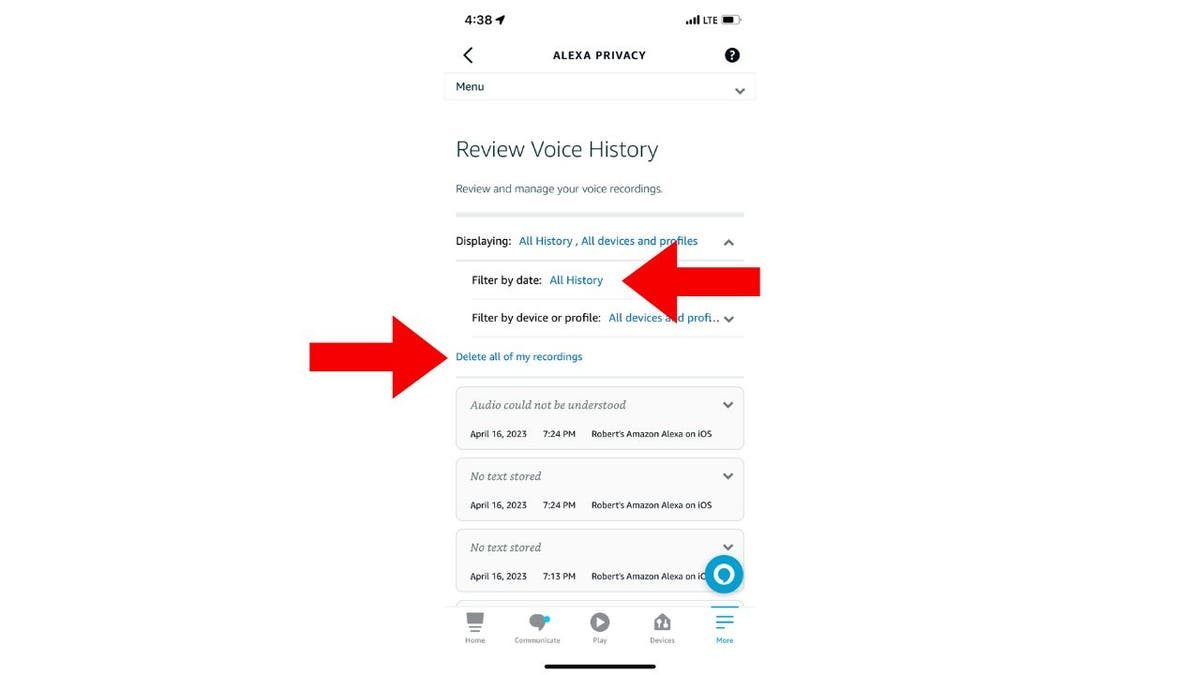 Deleting all Alexa voice recordings.
Automating Alexa History Deletion
For automatic deletion:
- Navigate to Settings > Alexa Privacy > Manage Your Alexa Data.
- In Voice Recordings, select Choose how long to save recordings.
- Choose to save recordings for 3 months, 18 months, or not at all.
- Click Confirm.
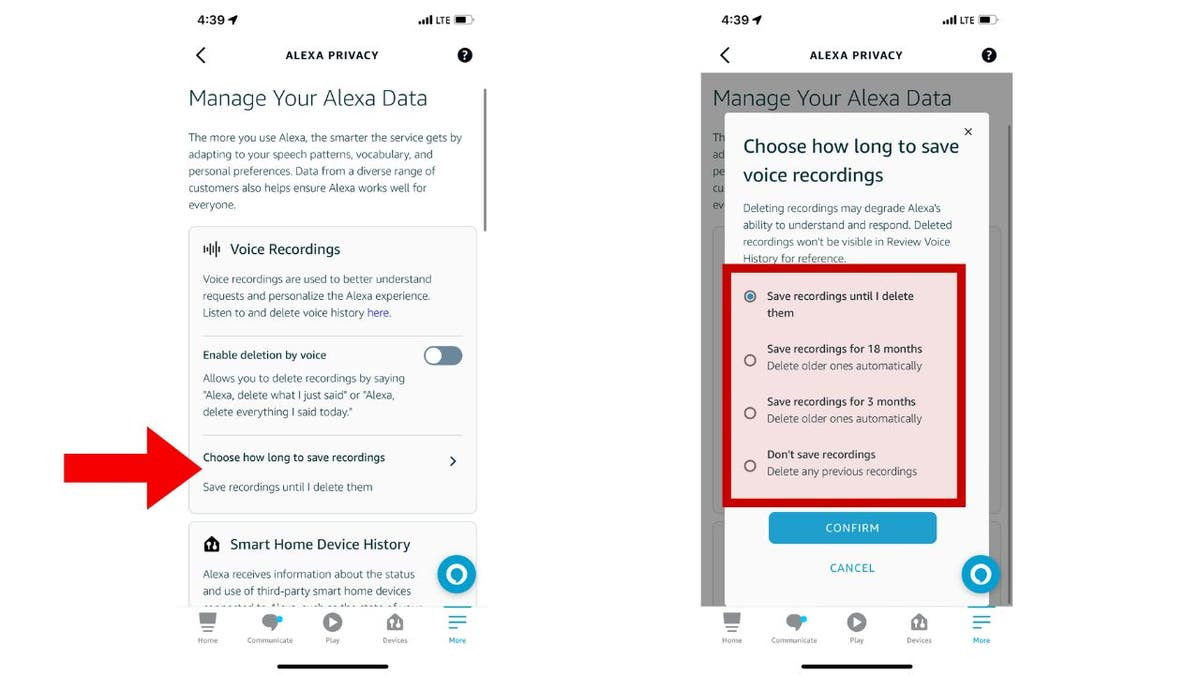 Choosing automatic deletion settings for your Alexa recordings.
Conclusion
By following these steps, you can easily manage and erase your Alexa history, ensuring your privacy and controlling the data associated with your smart speaker usage. Regularly deleting your history or setting up automatic deletion helps maintain your privacy and peace of mind.