Controlling your home lighting with just your voice is a huge convenience, and Alexa makes it easy. This guide explains how to use Alexa to turn lights on and off, including the necessary hardware, setup process, and creating schedules.
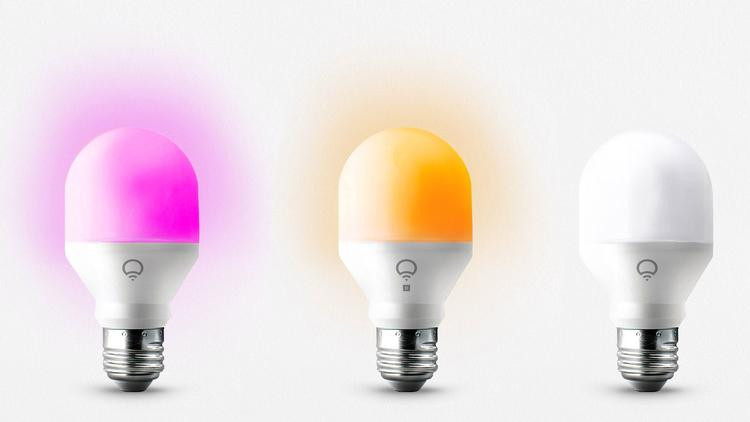 LIFX Mini Smart Bulb
What Hardware Do I Need?
Before you can command Alexa to control your lights, you’ll need compatible hardware. Here are the options:
- Smart Bulbs: These bulbs connect directly to your Wi-Fi network, allowing control via the Alexa app. Popular brands include Philips Hue and LIFX, offering both white and color options.
- Smart Plugs: These plug into a standard outlet and allow you to control any lamp or appliance plugged into them. They’re a cost-effective solution if you don’t want to replace existing bulbs. Amazon’s own Smart Plug and TP-Link’s Tapo Smart Plug are good options.
- Smart Wall Switches: These replace your existing light switches, enabling voice control over wired lights. Brands like Lightwave RF and Energenie MiHome offer Alexa-compatible switches but may require a separate hub.
- Shelly Wi-Fi Switches: For controlling ceiling lights, Shelly offers small, affordable Wi-Fi switches that fit inside standard wall switch boxes, eliminating the need for smart bulbs or external plugs.
- Alexa Device: You’ll need a device with Alexa built-in, such as an Amazon Echo, or you can use the Alexa app on your smartphone or tablet.
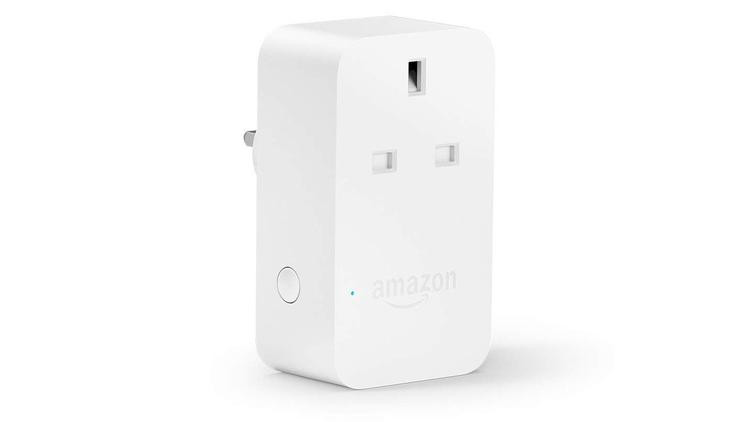 Smart Plug for Controlling Lamps
Setting Up Alexa to Control Lights
Once you have the necessary hardware, follow these steps to connect your lights to Alexa:
-
Install and Set Up Your Smart Device: Follow the manufacturer’s instructions to connect your smart bulbs, plugs, or switches to your Wi-Fi network. You may need to download a separate app and create an account.
-
Open the Alexa App: Launch the Alexa app on your Android, iOS, or Amazon Fire device.
-
Add Device: Tap on “Devices” at the bottom of the screen, then tap the “+” icon and select “Add Device.”
-
Choose Device Type: Select the type of device you are setting up (Light, Plug, or Switch).
-
Select Brand: Choose the brand of your device from the list.
-
Follow On-Screen Instructions: Link your device’s account (e.g., Philips Hue, TP-Link) with your Amazon account and authorize Alexa to access it.
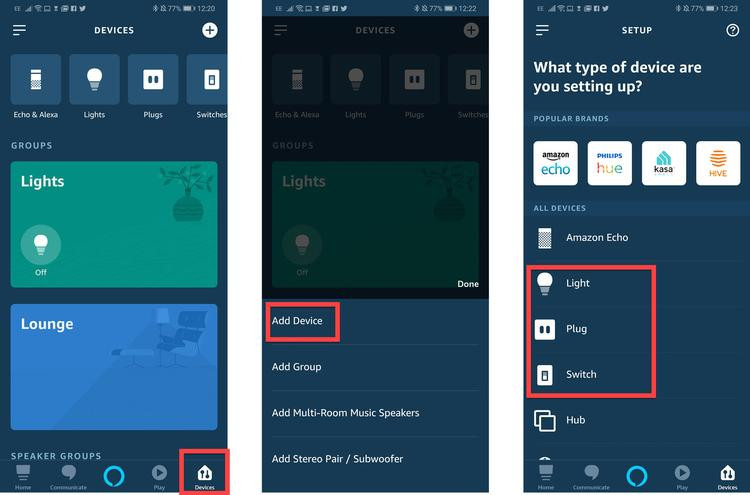 Adding a Device in the Alexa App
- Rename Your Device: For easier voice control, rename your device with a simple, memorable name. Tap on the device in the Alexa app, tap the cog icon, and then tap “Edit Name.”
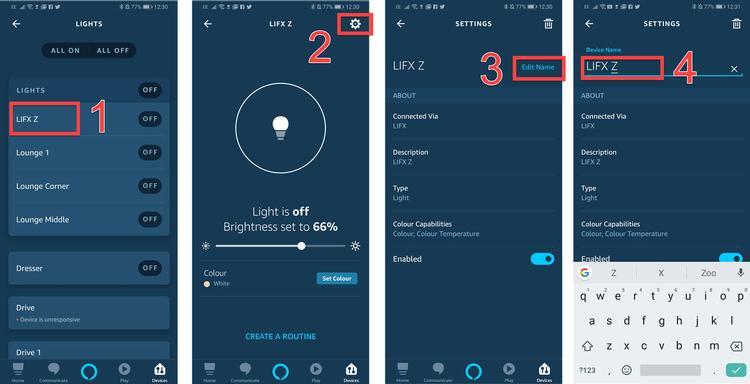 Renaming a Device in the Alexa App
Controlling Your Lights with Alexa
After setup, you can use simple voice commands:
-
Turn On/Off: “Alexa, turn on [light name]” or “Alexa, turn off [light name].”
-
Dimming: “Alexa, dim the [light name]” or “Alexa, brighten the [light name].”
-
Color Changing (for compatible bulbs): “Alexa, make the [light name] blue.”
Controlling Groups of Lights
You can group multiple lights together for easier control:
-
Create a Group: In the Alexa app, go to “Devices,” tap “+,” and select “Create a room or device group.”
-
Name Your Group: Choose a predefined room name or create a custom name (e.g., “Upstairs Lights”).
-
Add Devices: Select the lights you want to include in the group.
-
Save: Save your group. Now you can control all lights in the group with a single command: “Alexa, turn on [group name].”
Scheduling Lights with Alexa Routines
Alexa allows you to schedule lights to turn on and off automatically:
-
Create a Routine: In the Alexa app, open the menu and tap “Routines,” then tap the “+” icon.
-
Set a Schedule: Tap “+” next to “When this happens,” choose “Schedule,” and set the desired time and days for the routine to run.
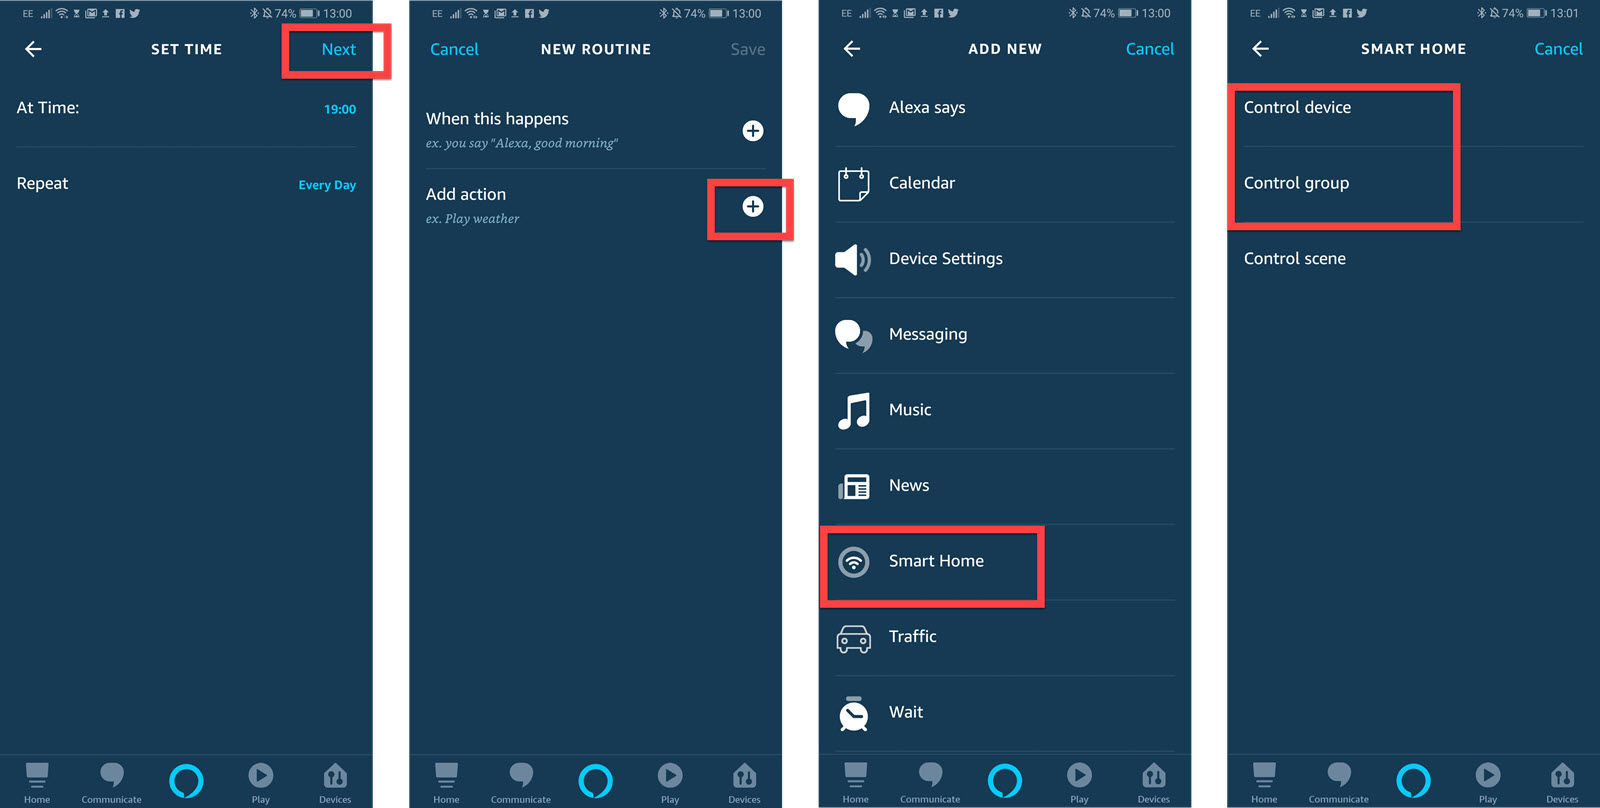 Setting a Schedule in Alexa Routines
-
Add Action: Tap “+” next to “Add action,” choose “Smart Home,” then select “Control device” or “Control group.”
-
Choose Power State: Set the power to “On” or “Off” as desired.
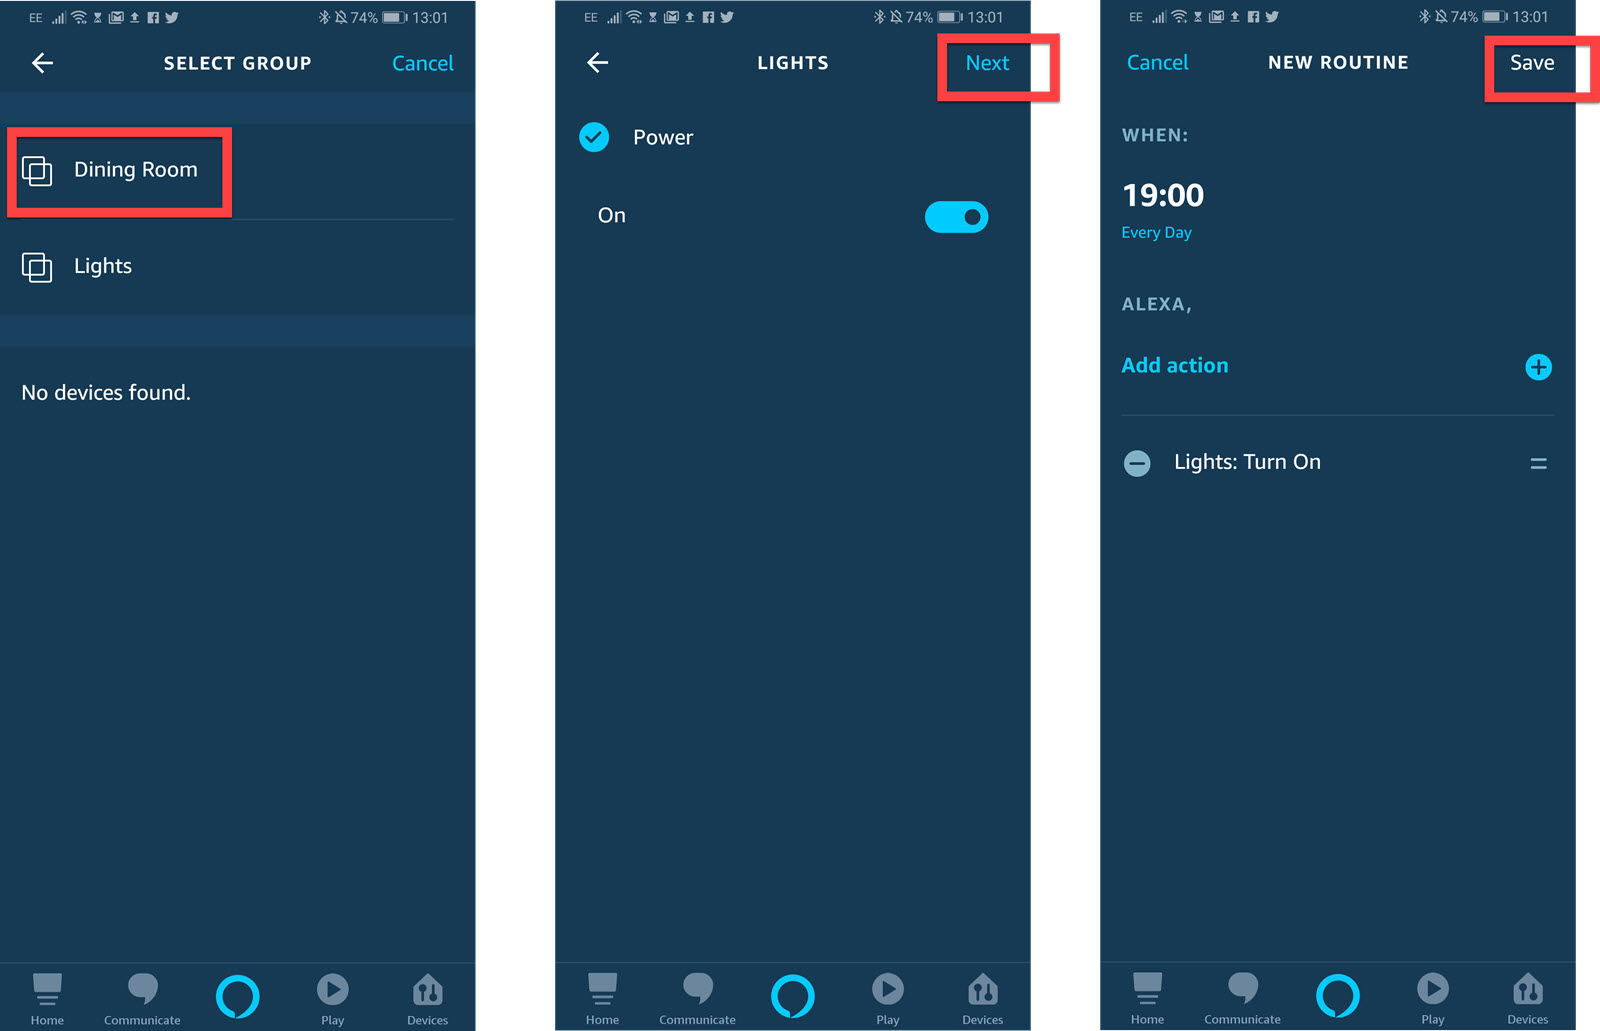 Choosing the Power State in Alexa Routines
- Save: Save your routine. Your lights will now turn on and off automatically according to the schedule.