Alexa, Amazon’s virtual assistant, is designed to learn and adapt to your voice and commands. To do this, it records your interactions. While this improves its performance, it also raises privacy concerns. Understanding how to access and manage your Alexa history is crucial for maintaining your privacy and controlling the data associated with your account. This guide provides a detailed walkthrough on how to view your Alexa history on both the mobile app and the web.
Accessing Your Alexa History via the Mobile App
Viewing your Alexa history on the mobile app is a straightforward process:
-
Launch the Alexa App: Open the Alexa app on your smartphone or tablet.
-
Access the Settings Menu: Tap the hamburger icon (three horizontal lines) located in the top left corner of the screen to open the menu. Then, select “Settings.”
-
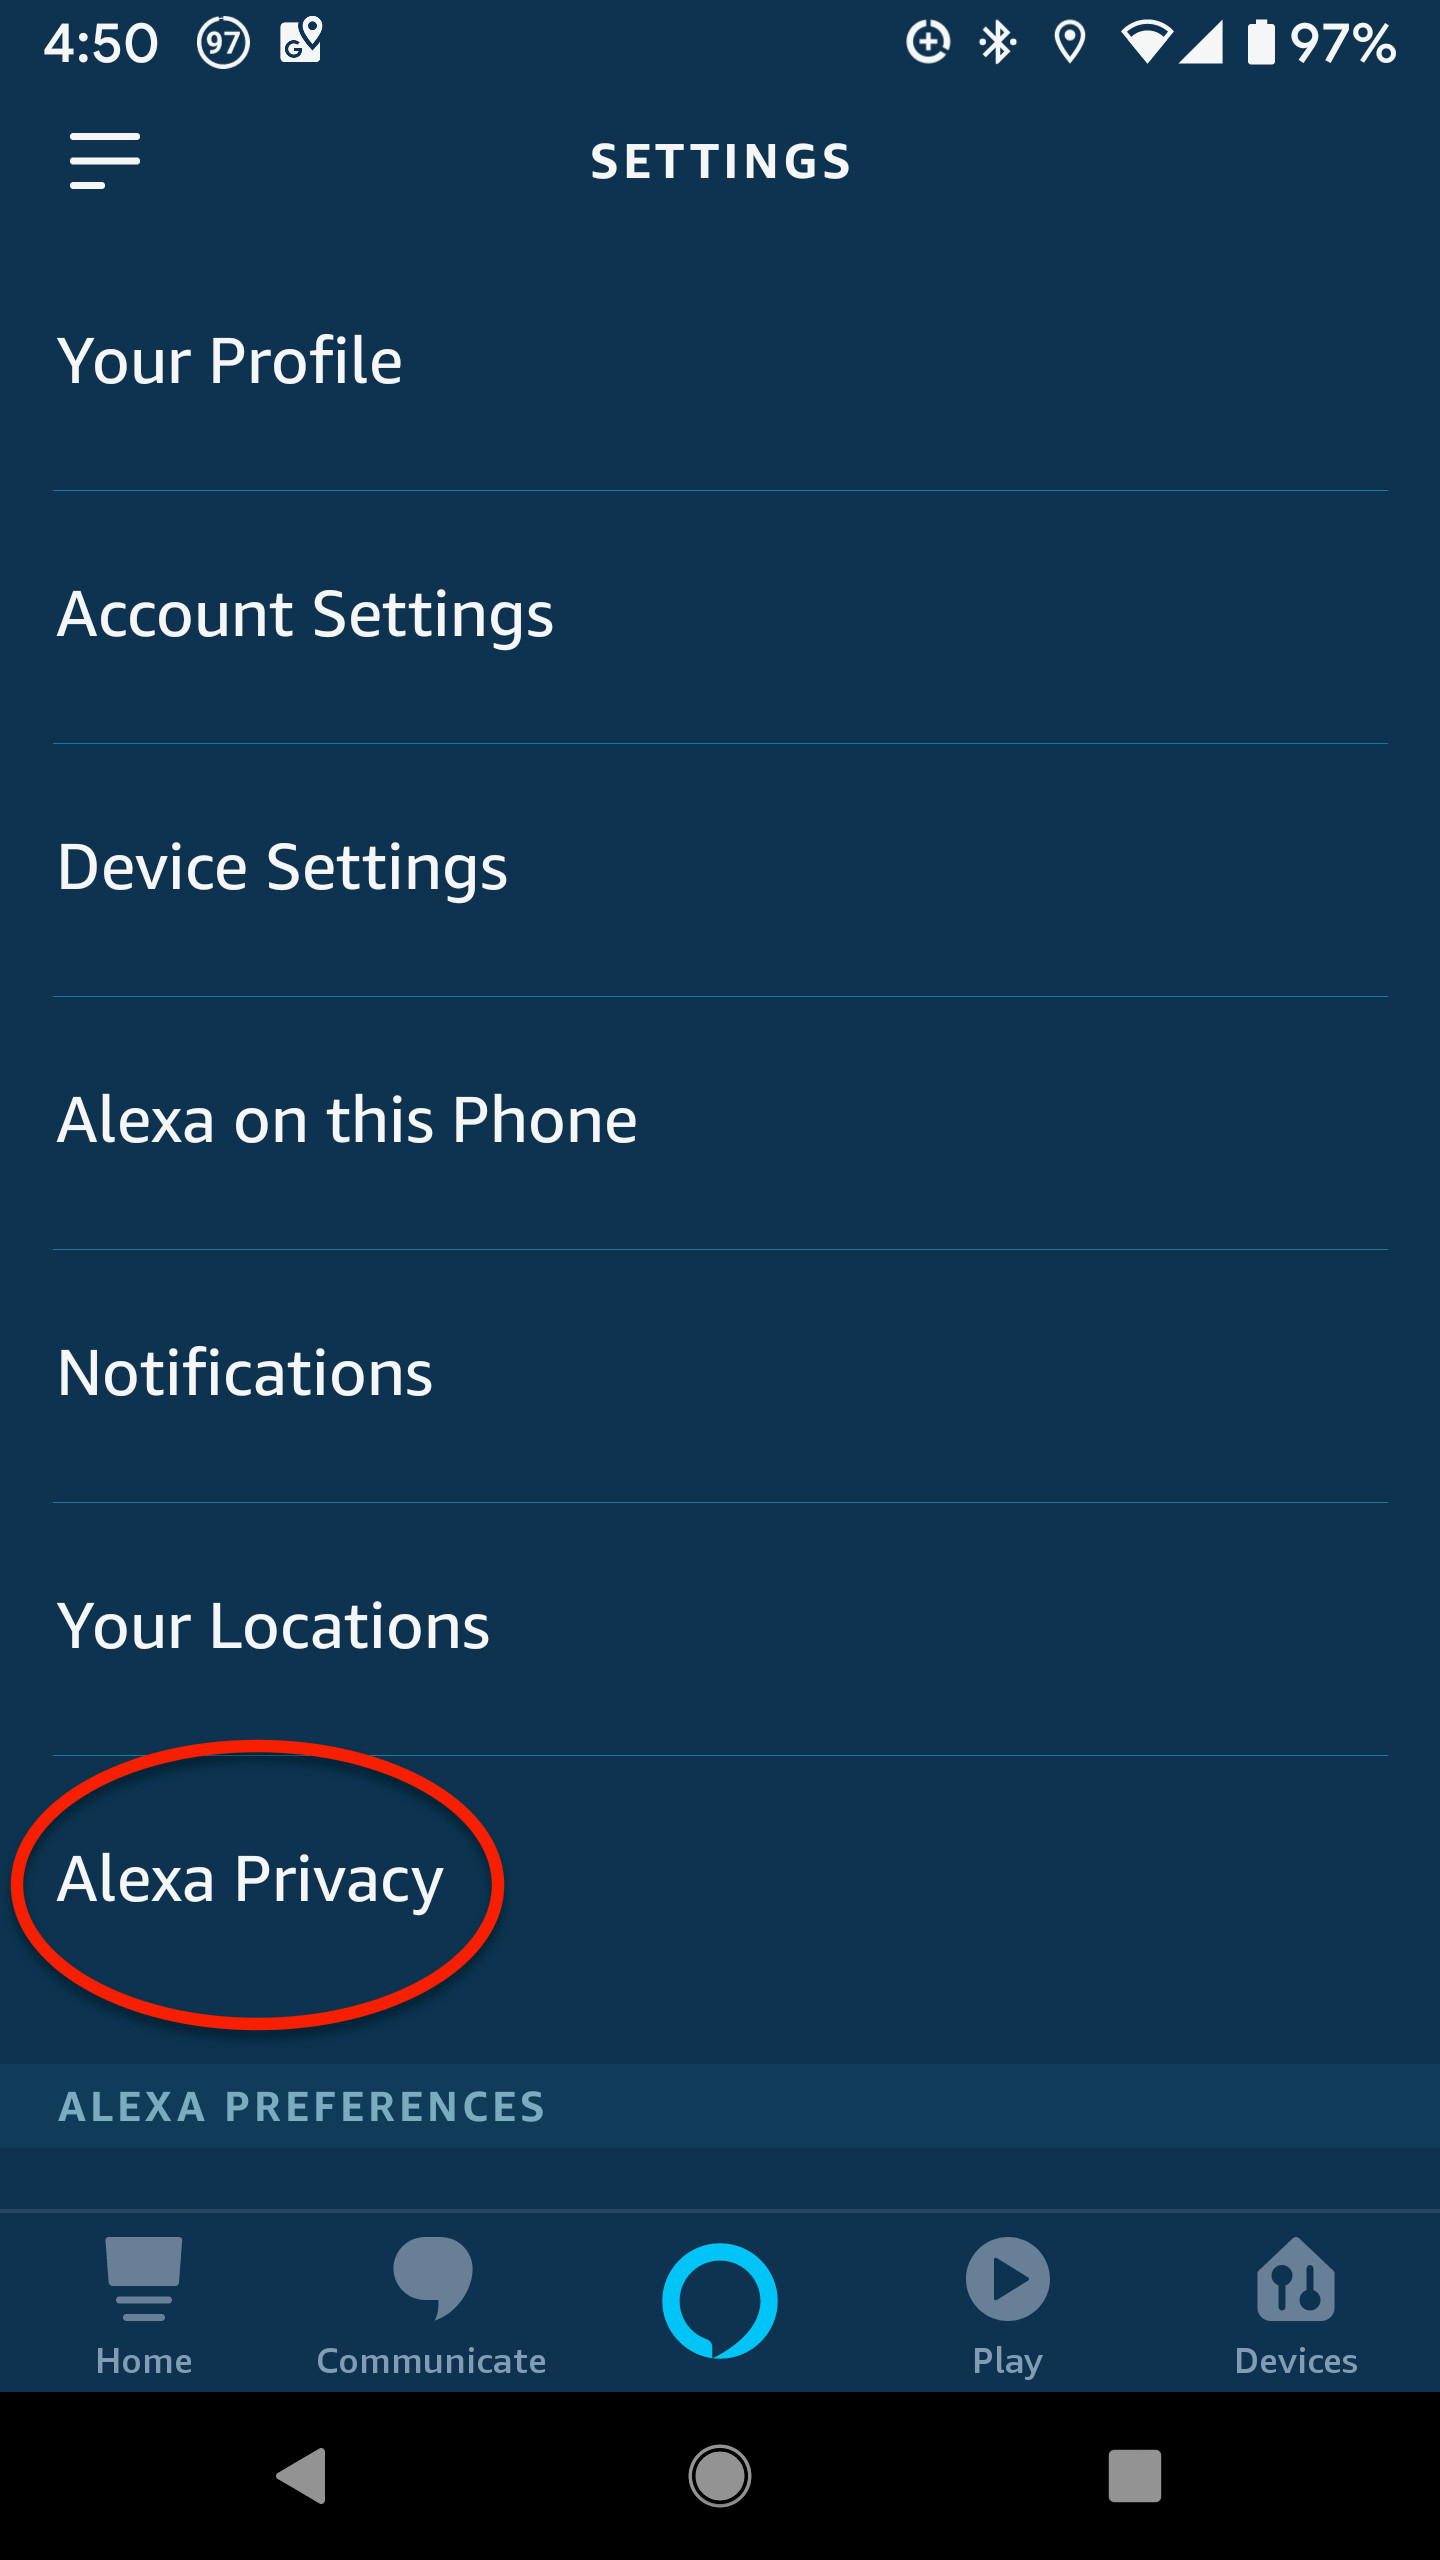
Navigate to Alexa Privacy: Within the Settings menu, tap on “Alexa Privacy.” This section houses all your interaction data with Alexa.
-
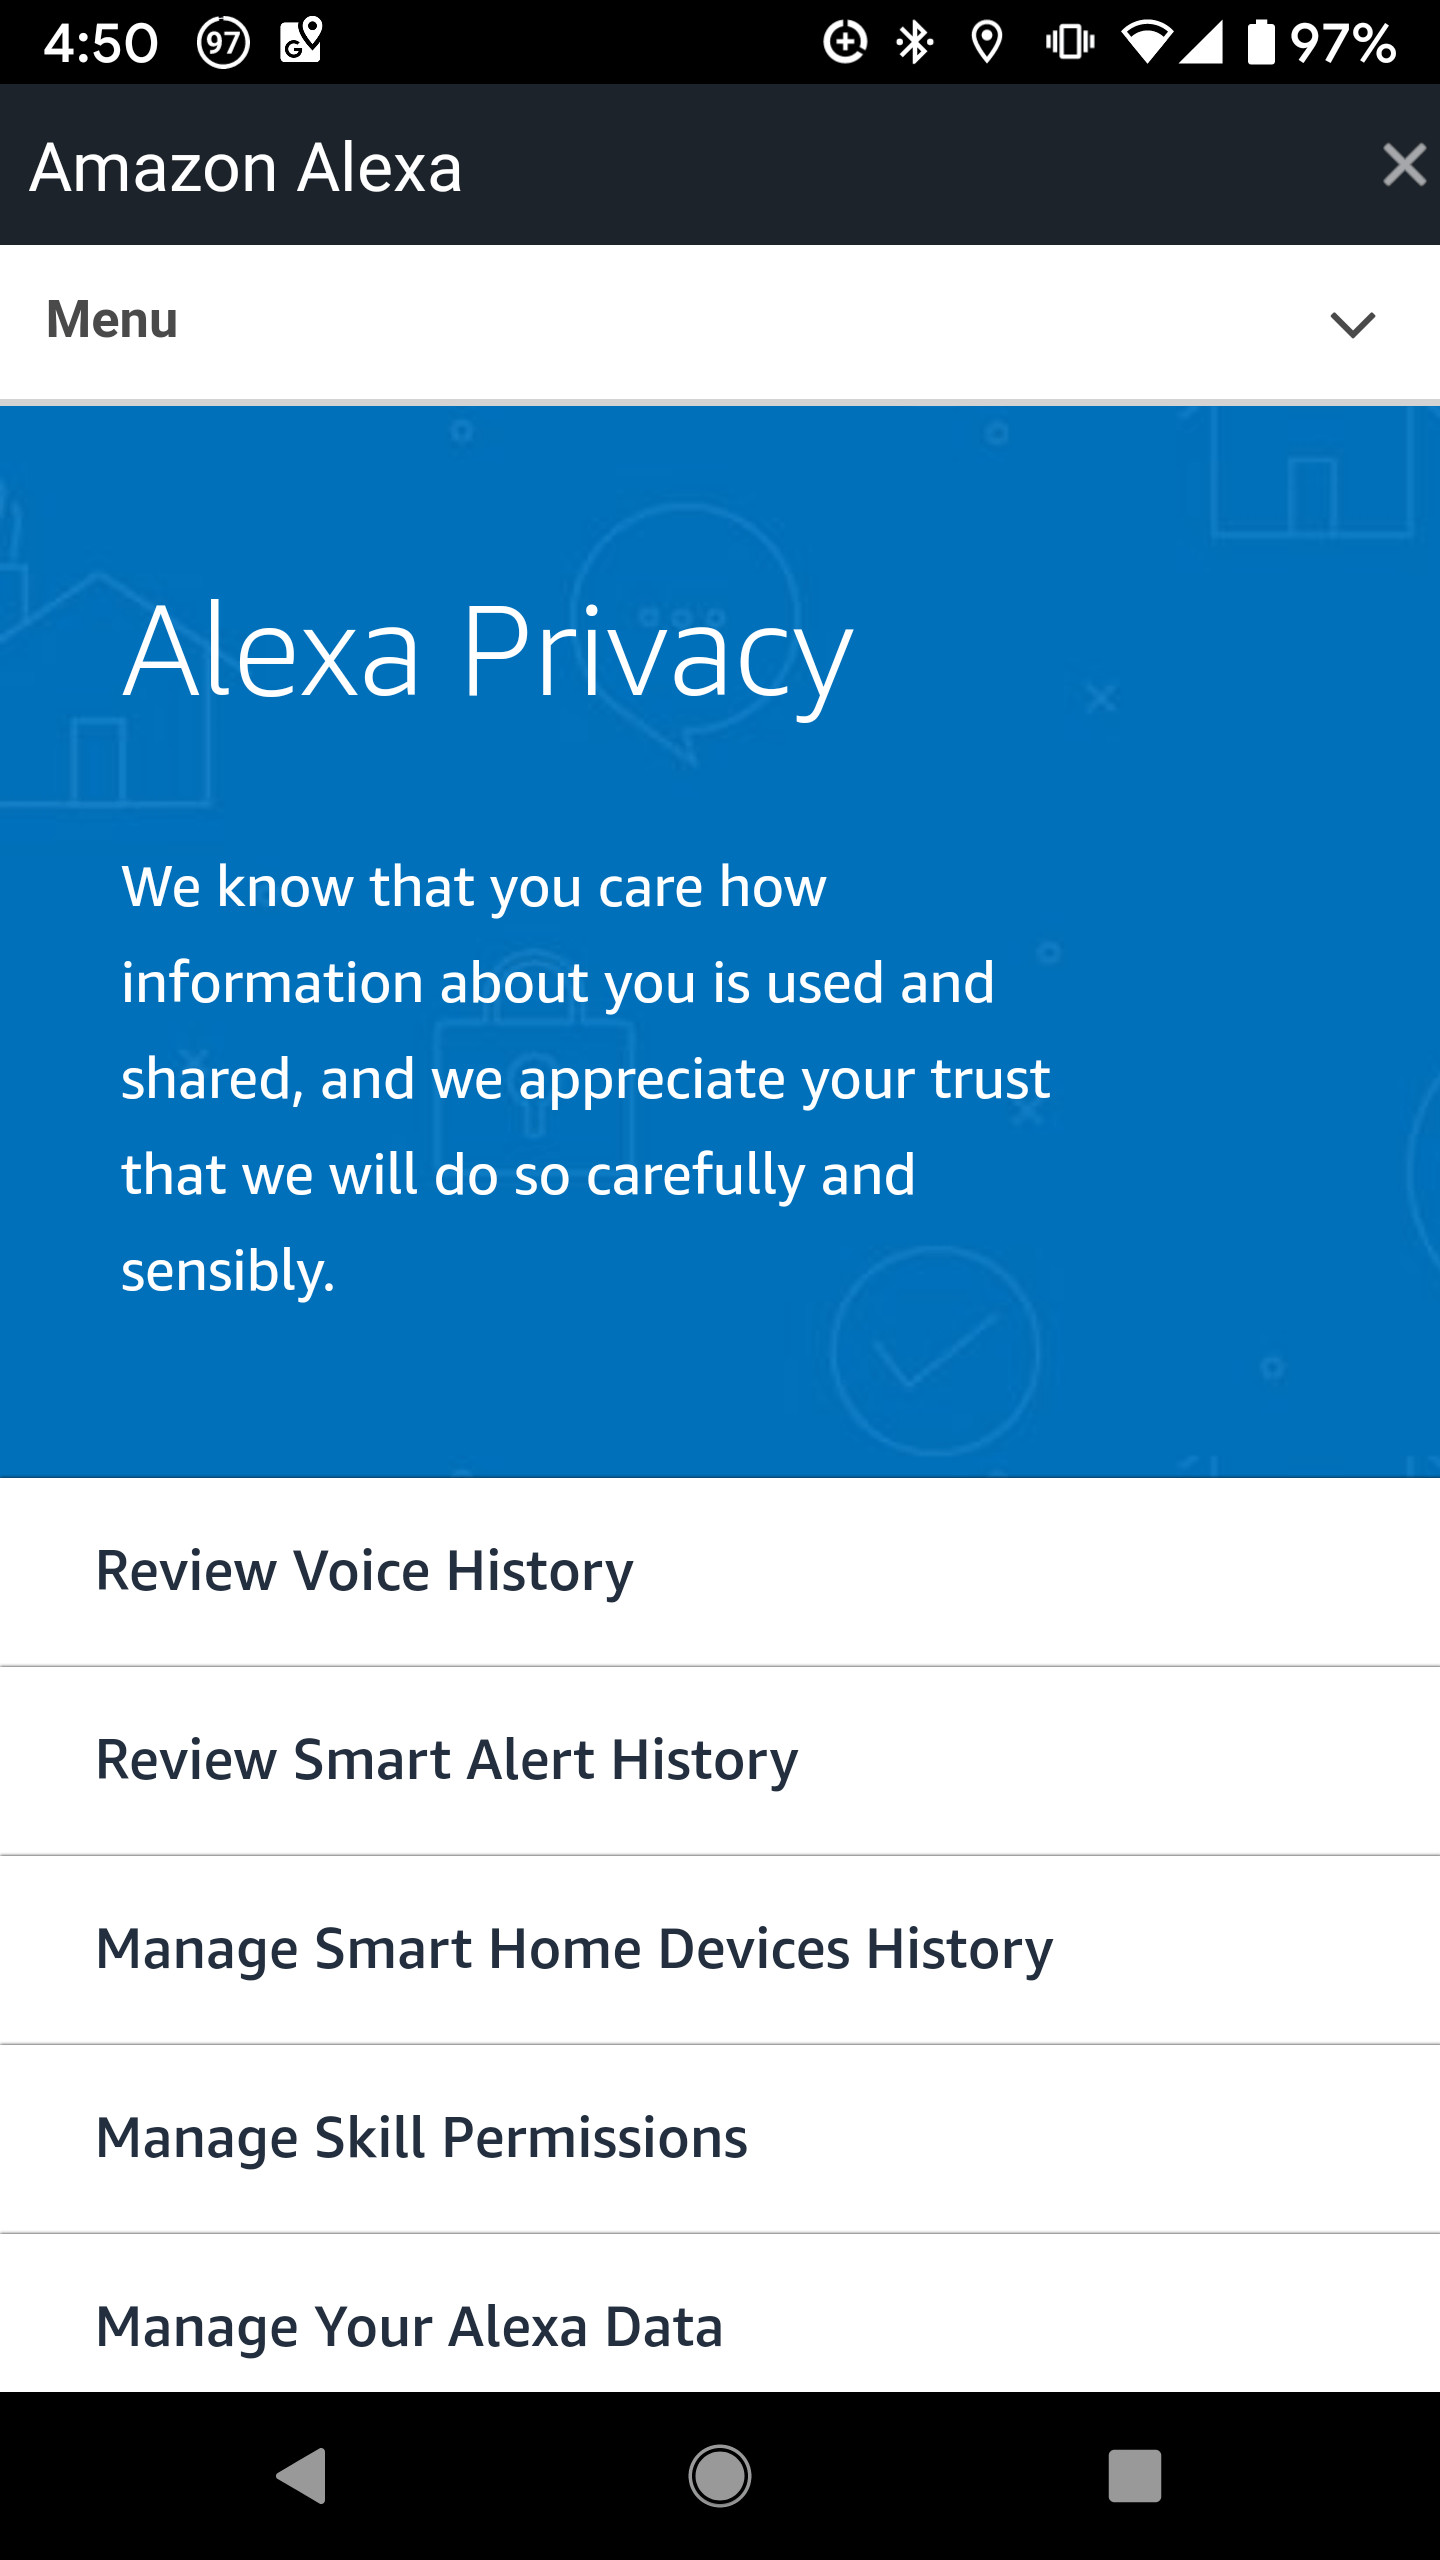
Browse Your History: Here, you’ll find a comprehensive log of all your commands, ranging from setting timers and playing music to general inquiries. Each entry includes a timestamp and the specific request.
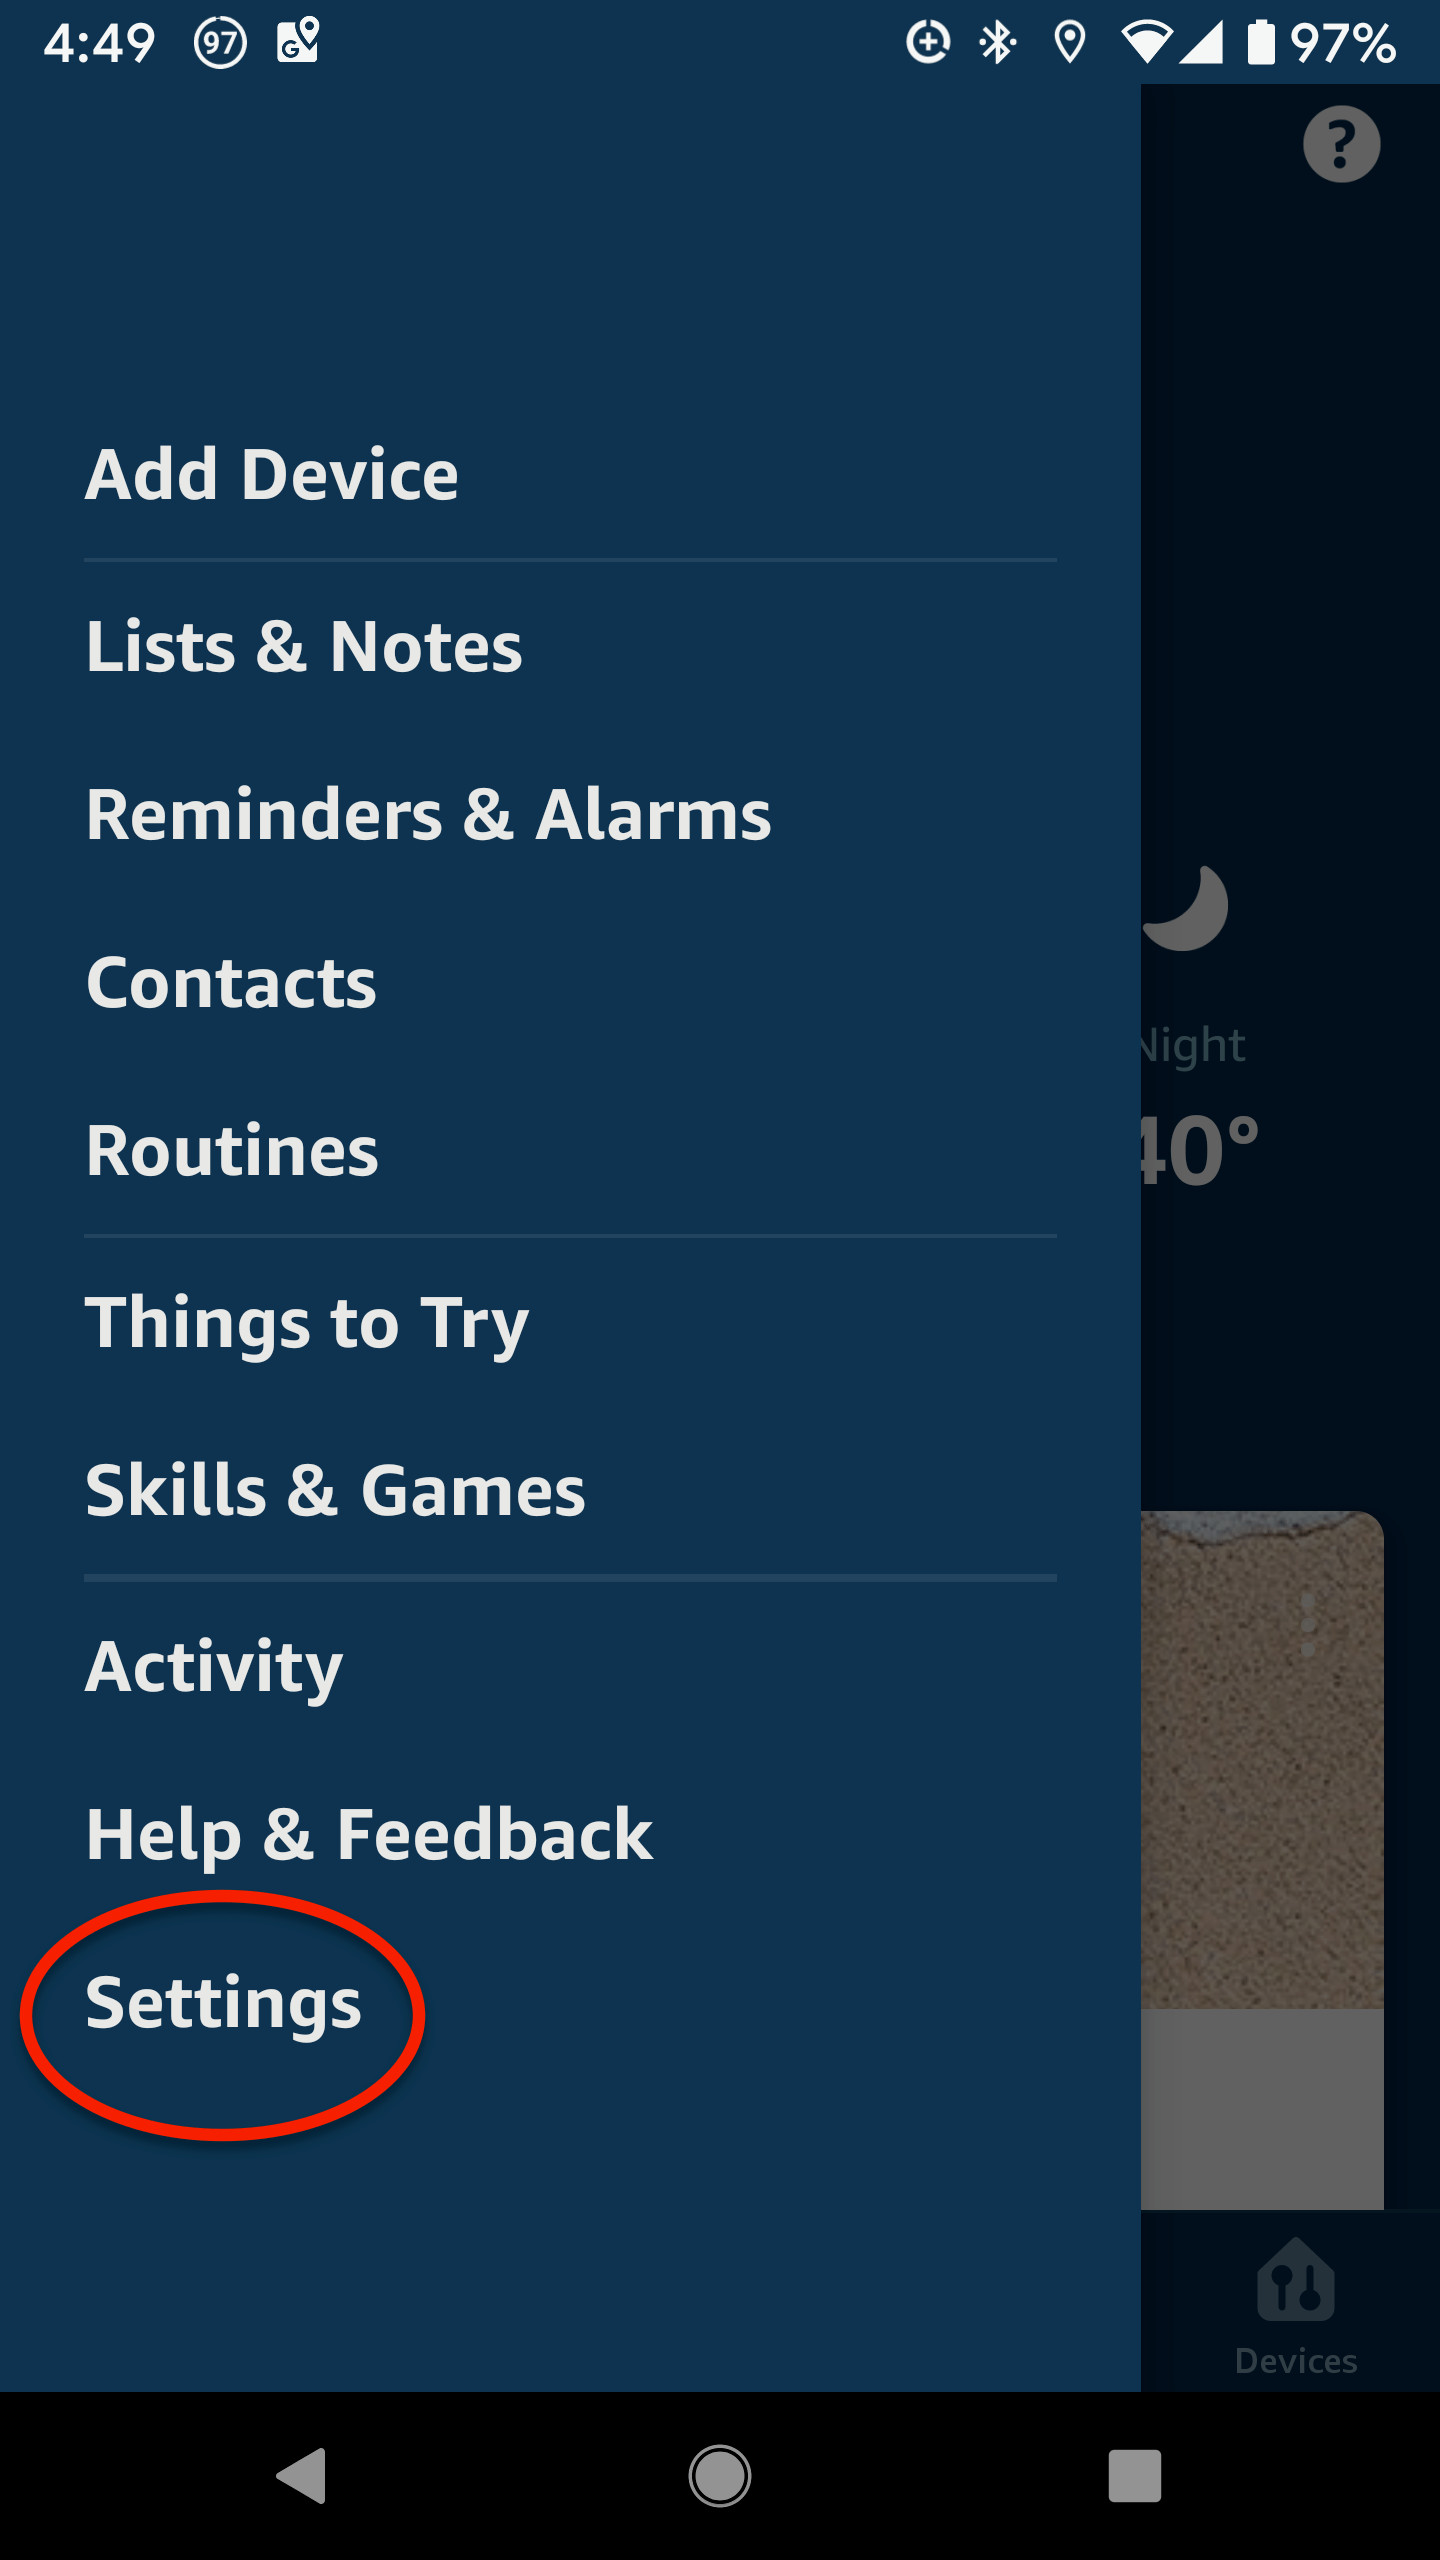 Accessing Alexa Privacy Settings in the mobile app
- Filter and Delete Recordings: You can filter your history by date (day, week, month, or custom range) using the dropdown menu. This feature also allows you to delete recordings in bulk by selecting the desired timeframe. Additionally, you can delete individual recordings by checking them off and selecting the delete option.
 Filtering and deleting Alexa voice recordings
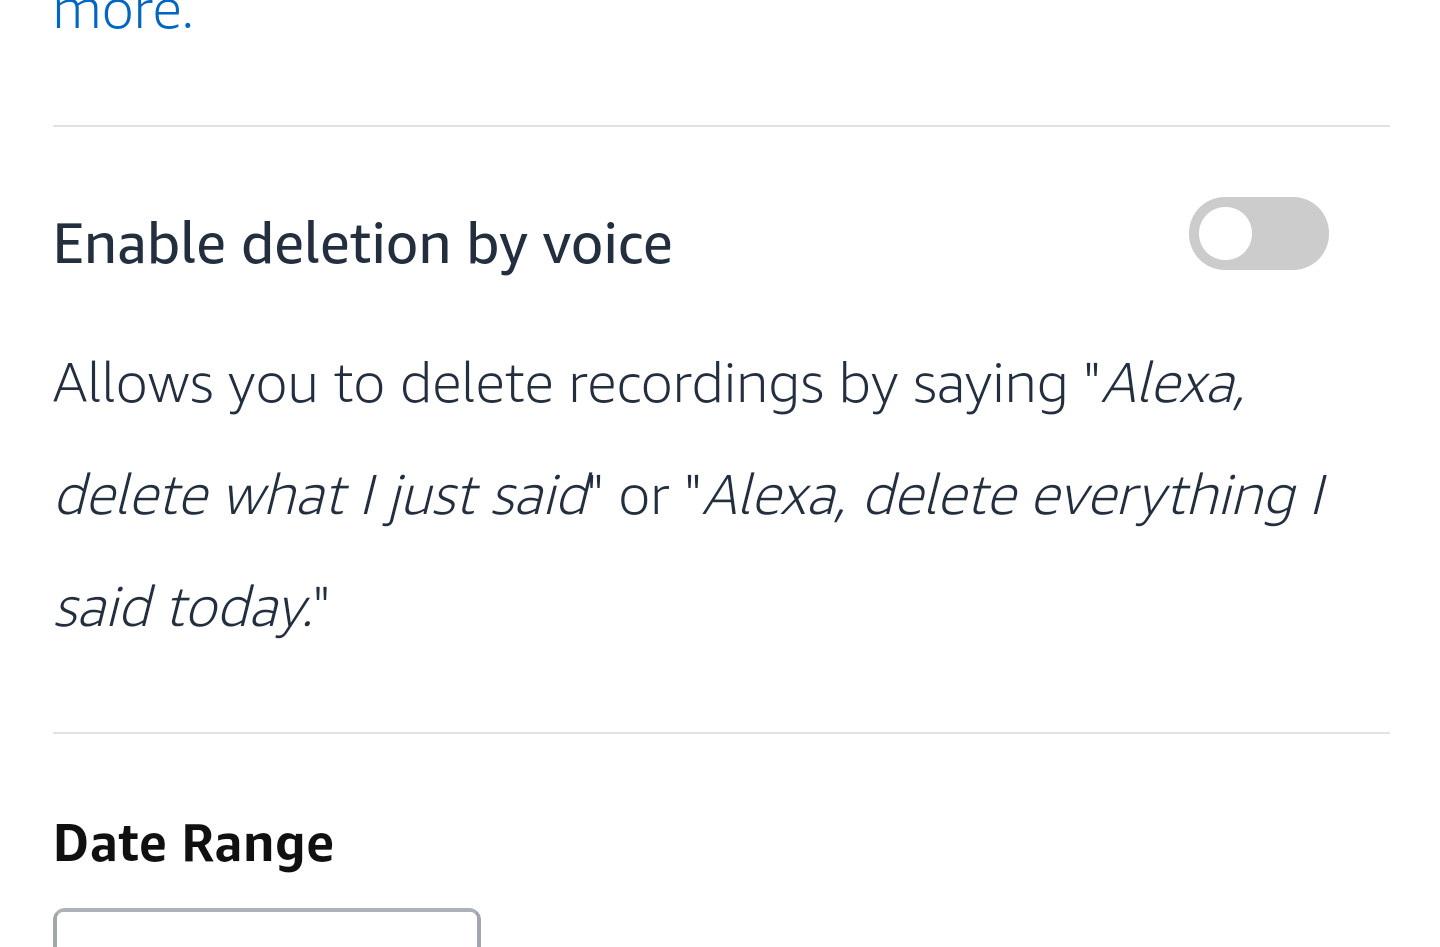
- Enable Voice Deletion: You can enable a feature that allows you to delete recordings using a voice command. However, be aware that anyone with access to your Alexa device can use this command.
 Enabling voice deletion for Alexa recordings
- Review Unrecognized Requests: You might encounter entries labeled “text not available” or “audio could not be understood.” Tapping on these entries allows you to listen to the recording and determine if it was a false trigger.
 Reviewing unintelligible or unintended Alexa recordings
Viewing Your Alexa History on the Web
Alternatively, you can manage your Alexa history on a desktop computer:
-
Visit the Alexa Privacy Page: Go to Amazon’s dedicated Alexa Privacy page.
-
Access Privacy Settings: Click on the “Privacy Settings” tab and then on the “Review voice recordings” link within the “View, hear, and delete your voice recordings” section.
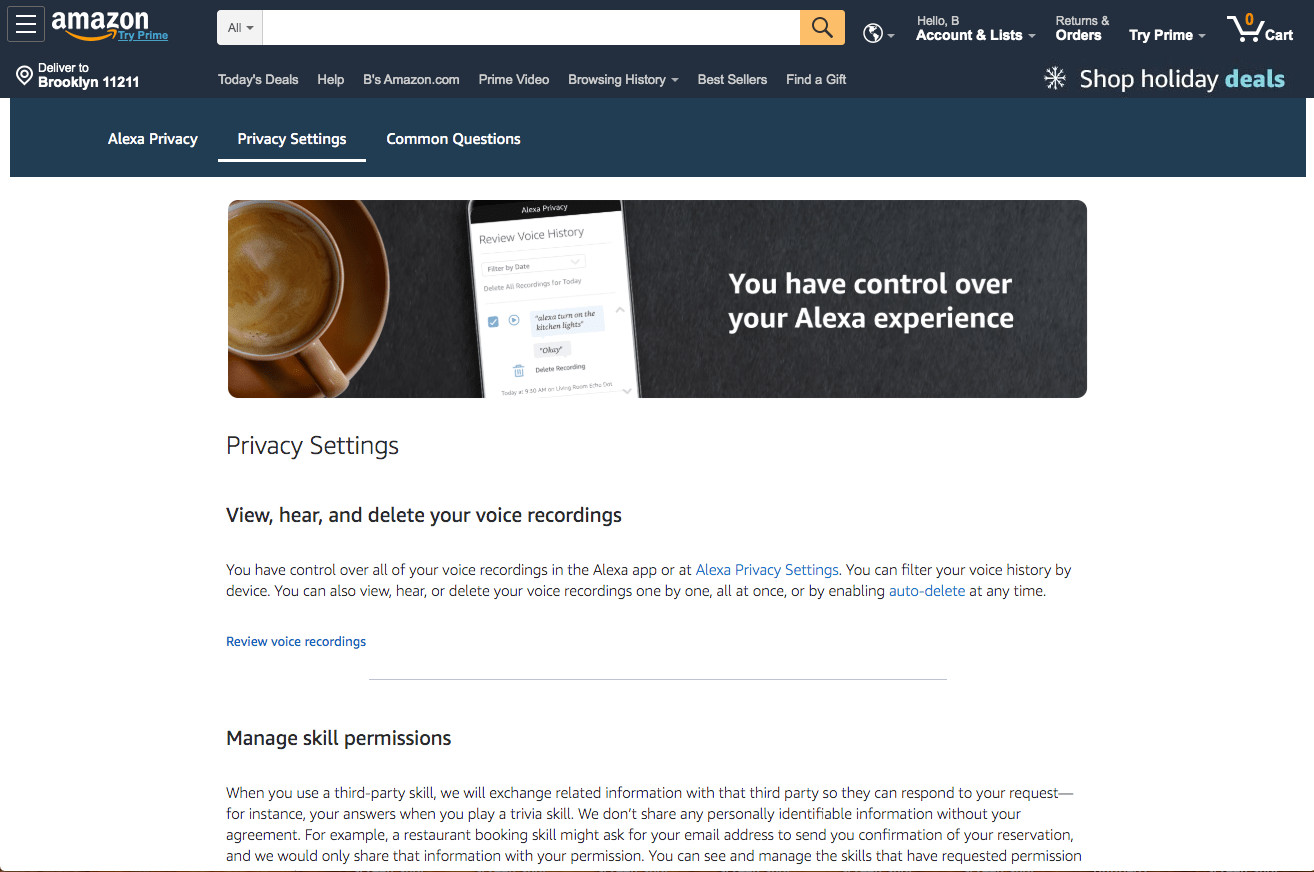 Accessing the Alexa Privacy settings on the Amazon website
- Review and Manage Recordings: This will take you to the “Review Voice History” page, where you can perform actions similar to those in the mobile app, including filtering by date, deleting individual or all recordings, and listening to specific interactions.
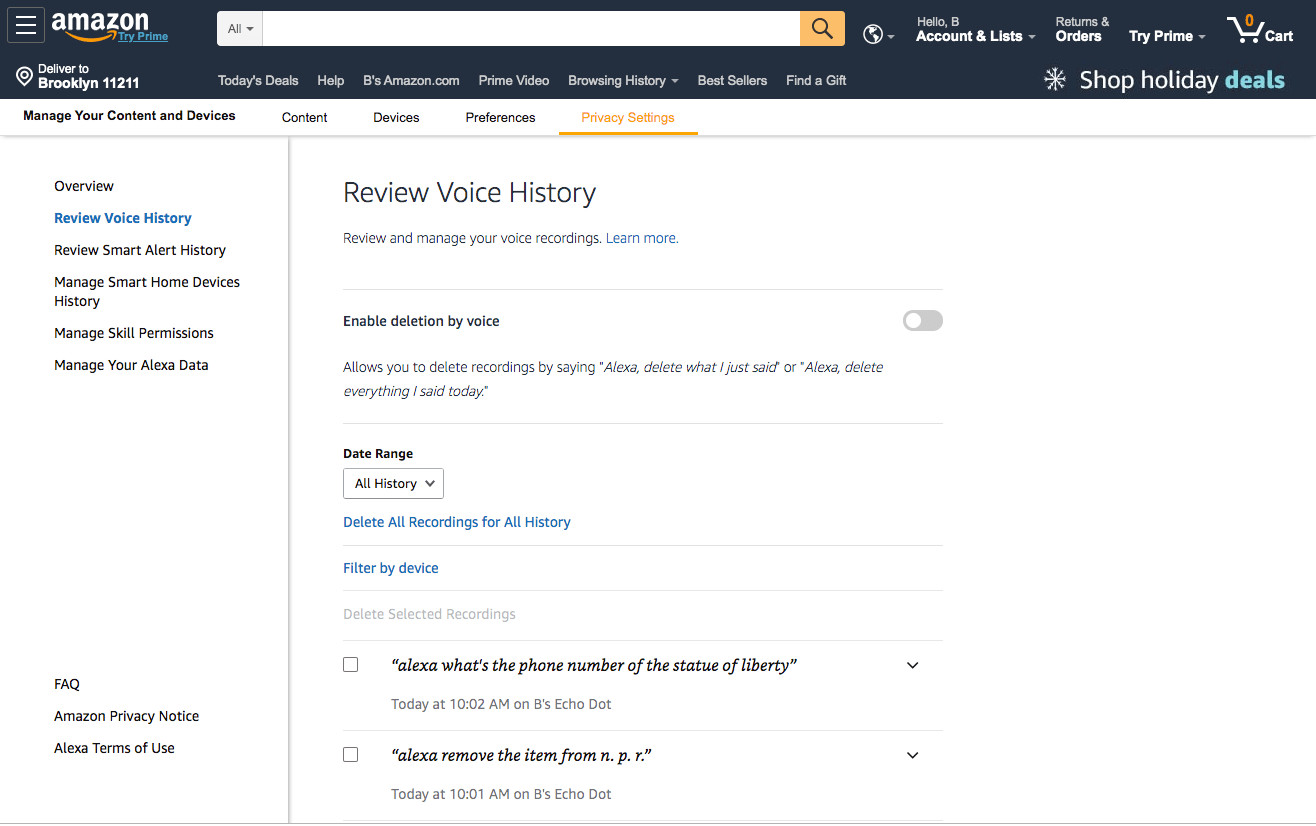 Reviewing and managing voice recordings on the Amazon website
- Automatic Deletion: In the “Manage Your Alexa Data” section, you can configure automatic deletion of voice recordings after three or 18 months.
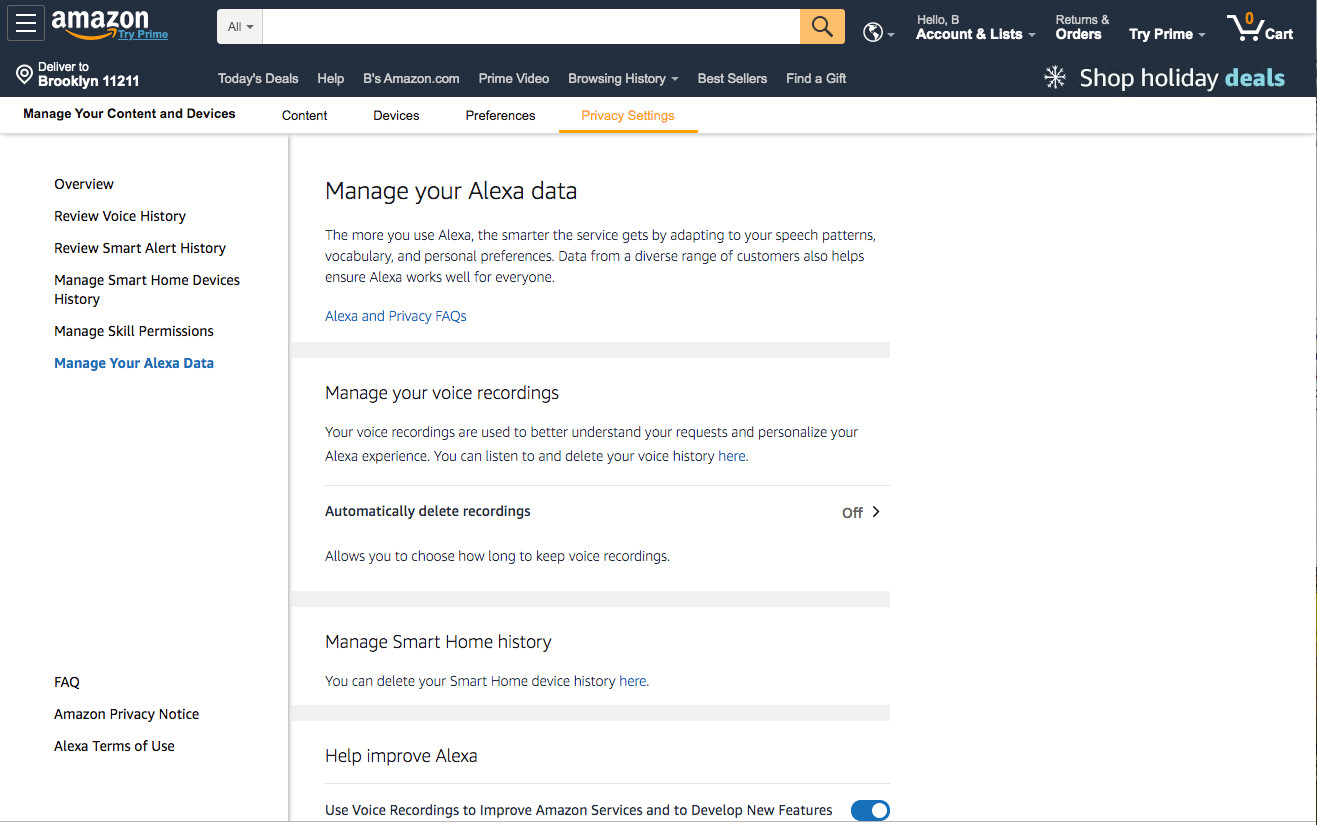 Setting up automatic deletion of Alexa voice recordings
Conclusion
Regularly reviewing and managing your Alexa history empowers you to maintain control over your personal data and ensure your privacy while utilizing the convenience of a virtual assistant. Amazon provides multiple avenues for accessing, filtering, and deleting these recordings, giving you the flexibility to manage your data according to your preferences.
