Smart plugs have revolutionized home automation, offering a simple yet effective way to control your electronic devices remotely. By transforming ordinary appliances into smart devices, these gadgets bring convenience and energy efficiency right to your fingertips. One of the most powerful integrations for smart plugs is with Amazon Alexa, allowing for seamless voice control and smart home routines. If you’re looking to enhance your smart home experience, pairing your smart plug with Alexa is a crucial step. This guide will walk you through the process, ensuring you can effortlessly manage your devices using voice commands or the Alexa app.
Before diving into the pairing process, it’s important to understand the capabilities and limitations of smart plugs. Essentially, a smart plug acts as an intermediary between your power outlet and your device, enabling you to switch the power supply on or off remotely. This functionality works perfectly with devices that have a physical on/off switch, such as lamps, fans, humidifiers, and coffee makers. However, devices that rely on electronic controls might not function as expected with a smart plug, as simply cutting off power might not replicate their intended “off” state.
While many smart plugs come with their own dedicated apps for control, connecting them to Alexa unlocks a world of unified smart home management. Alexa allows you to control multiple smart devices from different brands all within a single platform, whether through voice commands or the user-friendly Alexa app interface. This centralized control simplifies your smart home experience, making it more intuitive and efficient. Let’s explore how to set up your smart plug and then seamlessly connect it to Alexa.
Setting Up Your Smart Plug: Initial Configuration
Before you can link your smart plug to Alexa, you’ll typically need to configure it using its own companion app. This initial setup connects the smart plug to your home’s Wi-Fi network, enabling it to communicate with other devices and platforms like Alexa. The process might vary slightly depending on the brand of your smart plug, but the general steps remain consistent. For this guide, we’ll reference the TP-Link Kasa Smart Plug Mini as an example, but the instructions are broadly applicable to most smart plugs on the market. Note that if you are using an Amazon Smart Plug, the setup process is even more streamlined and often begins directly within the Alexa app. If you’ve already set up your smart plug using its app, you can skip directly to the section on connecting to Alexa.
-
Install the Smart Plug’s Companion App: The first step is to download the dedicated app for your smart plug from the Apple App Store for iOS devices or the Google Play Store for Android devices. For TP-Link Kasa smart plugs, this would be the “Kasa Smart” app. Search for your smart plug brand’s app and install it on your smartphone.
-
Launch the App and Sign In or Create an Account: Open the companion app and follow the prompts to sign in. If you are a new user, you’ll need to create an account. This usually involves providing an email address and setting up a password. Creating an account is essential as it allows you to remotely control your smart plug and manage its settings.
Important Note on Local Network Permissions: Many smart plug apps require permission to access your local network to discover and connect to devices. You may be prompted to grant this permission. On iPhones running iOS 17 or earlier, navigate to Settings > Privacy & Security > Local Network. For iOS 18 or later, go to Settings > Apps, select the app, and ensure the “Local Network” slider is toggled to green, indicating permission is granted. This permission is crucial for the app to communicate with your smart plug on your Wi-Fi network.
-
Initiate Device Setup within the App: Look for an option to add a new device. This is often represented by a “Add Device” button, a “Set Up New Device” option, or a “+” icon, typically located in the top-right corner of the app interface. Tap this option to begin the device setup process.
-
Select Your Smart Plug Model: You will be presented with a list of device types or models. Choose “Smart Plug” or the specific model number of your device. Refer to the packaging or the smart plug itself for the exact model number to ensure you select the correct one in the app.
-
Plug in Your Smart Plug: Physically insert your smart plug into a power outlet. Choose an outlet that is conveniently located and suitable for the device you intend to control with the smart plug.
-
Activate Pairing Mode on the Smart Plug: Most smart plugs need to be placed in pairing mode to connect to your Wi-Fi network. Some plugs enter pairing mode automatically when first plugged in, often indicated by a flashing light. If it doesn’t start automatically, there’s usually a button on the smart plug that you need to press and hold for a few seconds to initiate pairing mode. Check your smart plug’s manual for specific instructions on how to activate pairing mode, and look for a flashing LED light as a visual cue that it is in pairing mode.
-
Connect to the Smart Plug’s Wi-Fi Network (Temporary): Your smartphone will now need to temporarily connect to the smart plug’s Wi-Fi network. The app will guide you through this process. Typically, you’ll need to go to your phone’s Wi-Fi settings, find the Wi-Fi network name that corresponds to your smart plug (it usually contains the brand name or model number), and select it to connect. This step establishes a direct connection between your phone and the smart plug for initial configuration.
-
Connect the Smart Plug to Your Home Wi-Fi: Once connected to the smart plug’s temporary Wi-Fi, the app will prompt you to choose your home Wi-Fi network and enter its password. This is the crucial step that connects your smart plug to your home network, allowing it to be controlled remotely and integrate with services like Alexa. Ensure you select your correct 2.4 GHz Wi-Fi network and enter the password accurately. Most smart plugs operate on the 2.4 GHz band, so confirm your router settings if you encounter connection issues.
-
Complete Setup in the App: After successfully connecting to your Wi-Fi, the app will finalize the setup. You may be asked to name your smart plug and assign it to a room. Once completed, your smart plug should be successfully set up and controllable via its companion app. You can now test it by turning it on and off through the app interface.
Connecting Your Smart Plug to Alexa: Voice Control and Smart Home Integration
With your smart plug successfully set up and connected to your Wi-Fi, the next step is to integrate it with Amazon Alexa. This integration allows you to control the smart plug using voice commands via Alexa-enabled devices like Amazon Echo or through the Alexa app. The process is straightforward and involves enabling the smart plug’s skill in the Alexa app and discovering your device.
-
Open the Alexa App: Launch the Amazon Alexa app on your smartphone. If you don’t have it installed, download it from the Apple App Store or Google Play Store. Sign in with your Amazon account credentials.
-
Navigate to the Devices Section: At the bottom of the Alexa app screen, you’ll find a navigation bar. Tap on the “Devices” icon, typically located on the right side.
-
Initiate Adding a New Device: In the “Devices” screen, look for a “+” icon, usually in the top-right corner. Tap this icon to add a new device to your Alexa ecosystem.
-
Select “Add Device”: A pop-up menu will appear from the bottom of the screen. Choose “Add Device” from the options presented.
-
Choose “Plug” as the Device Type: You’ll be presented with a list of device categories. Scroll through the list or use the search bar at the top to find “Plug.” Tap on “Plug” to proceed with connecting a smart plug.
-
Select Your Smart Plug Brand: Alexa will display a list of smart plug brands. Find and select the brand of your smart plug from the list. If you have an Amazon Smart Plug, you can follow the on-screen prompts which might include scanning a QR code on the device or holding the power button to initiate setup. For other brands, proceed with selecting the manufacturer.
-
Confirm Plug is Plugged In: Alexa will ask you to confirm that your smart plug is plugged into a power outlet. Ensure your smart plug is powered on and tap “Next” to continue.
-
Confirm Setup in Companion App: Alexa will verify that you have already set up your smart plug using its companion app. As we completed this in the previous section, tap “Next” to confirm. Note that Amazon Smart Plugs are an exception and can be set up directly through Alexa, but for most other brands, initial setup via their app is necessary.
-
Alexa Discovers Your Smart Plug: Alexa will now begin searching for your smart plug. Ensure your smartphone and smart plug are in close proximity during this discovery process. The Alexa app will communicate with the smart plug through your Wi-Fi network to establish the connection.
-
Assign the Smart Plug to a Room: Once Alexa discovers your smart plug, you’ll be prompted to assign it to a room. This helps with organization and voice commands (e.g., “Alexa, turn off the living room lights”). Select the appropriate room from the list or create a new room if needed.
-
Complete the Connection: Finally, tap “Continue” and then “Done” to finalize the connection. Your smart plug is now successfully linked to Alexa and ready to be controlled using voice commands or the Alexa app. You can now test voice commands like “Alexa, turn on [smart plug name]” or “Alexa, turn off [smart plug name]”.
Managing Your Smart Plug Settings in Alexa: Customization and Control
After successfully pairing your smart plug with Alexa, you can further customize its settings and manage it directly within the Alexa app. This includes changing the name, disconnecting it from Alexa, and exploring advanced features like routines.
-
Open the Alexa App and Go to Devices: Launch the Alexa app and tap on “Devices” in the bottom navigation bar.
-
Filter by Device Type: To easily find your smart plug among other devices, select “Device Type”. This option helps you filter devices by category. If you don’t have many devices, you can also scroll through the entire list.
-
Choose “Plugs” and Apply Filter: From the device type options, select “Plugs” and then tap “Apply”. This will display only your smart plugs in the device list.
-
Select Your Smart Plug: Locate your smart plug in the list. If you recently connected it, it should appear at the top. Tap on the name of your smart plug to access its settings.
-
Access Device Settings: On the smart plug’s device page, you’ll see a gear icon in the top-right corner. Tap this gear icon to open the device settings menu.
-
Edit Name and Other Settings: In the settings menu, you can modify various aspects of your smart plug. Tapping “Edit Name” allows you to change the name of your smart plug, which is helpful for voice commands and organization. You can also find options to disable the smart plug or remove it from Alexa entirely using the trash icon.
-
Explore Routines for Automation: By navigating back to the previous screen (by tapping the back arrow in the top-left corner), you’ll find an option at the bottom labeled “Create Routine.” Routines allow you to automate your smart plug’s actions based on triggers like time of day, location, or other smart home device interactions. For instance, you can create a routine to automatically turn off your smart plug when you leave home, enhancing energy efficiency and convenience.
By following these steps, you’ve not only set up your smart plug and connected it to Alexa but also learned how to manage its settings and explore automation possibilities. Integrating smart plugs with Alexa brings a new level of convenience and control to your home, making your daily routines simpler and smarter. Embrace the power of voice control and smart home automation to enhance your living space.
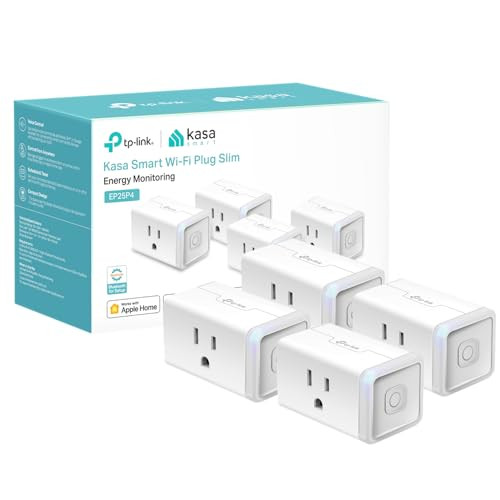 Kasa Smart Plug Mini on Amazon
Kasa Smart Plug Mini 15A, Apple HomeKit Supported, Smart Outlet Works with Siri, Alexa & Google Home
Key Features:
- Apple HomeKit Support: Seamless integration with Apple HomeKit for Siri voice control.
- Energy Monitoring: Track real-time and historical energy usage via the Kasa Smart app.
- Easy Setup: Amazon Frustration-Free Setup & Google Seamless Setup supported for quick installation.
- Compact Design: Doesn’t block adjacent outlets and features a flame retardant design.
- Voice & App Control: Control from anywhere using the Kasa app or voice commands with Siri, Alexa, and Google Assistant.
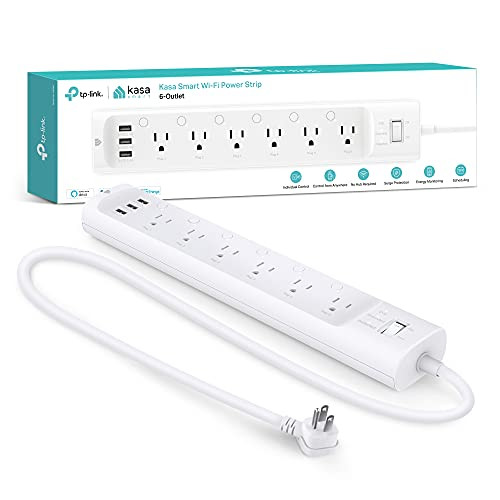 Kasa Smart Plug Power Strip HS300 on Amazon
Kasa Smart Plug Power Strip HS300, Surge Protector with 6 Smart Outlets & 3 USB Ports
Key Features:
- 6 Smart Outlets & 3 USB Ports: Independently control 6 outlets and charge 3 USB devices.
- Surge Protection: ETL certified surge protection to safeguard electronics.
- Energy Monitoring: Monitor energy consumption for each outlet via the Kasa Smart app.
- Remote Control: Control devices from anywhere using the Kasa Smart app.
- Voice Control Compatibility: Works with Alexa, Google Assistant, and Microsoft Cortana for voice commands.